


We do not always have all that we need. Regardless of what device you use, you may find out that you need to set up an environment that is unlike what your system was built on either to develop and test new applications, run old applications and so on.
You could dual boot a system or set up a full-scale virtual machine with a hypervisor but not everyone can afford the time or compute it would take to set these up.
As I have been in such a situation myself, I will be describing a relatively lightweight path to setting up a Linux virtual machine on either a Windows or macOS host machine.
The Hypervisor
A hypervisor or virtual machine monitor is computer software, firmware or hardware that creates and runs virtual machines. The hypervisor presents the guest operating systems (virtual machine) with a virtual operating platform and manages the execution of the guest operating systems. There are lots of hypervisors but we will be using virtual box in this article. Click this link to download it for your respective operating systems. The installation process is quite direct, all recommendations should be followed.
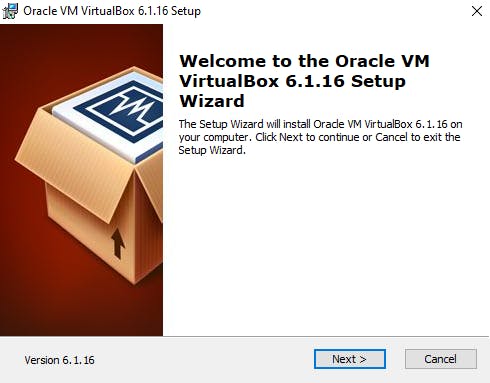 Once the screen below is seen, click 'YES' and continue until it completes the installation and then click 'Finish'.
 |
 |
Multipass
I stumbled upon Multipass whilst exploring the Ubuntu website. It was described as a mini cloud option that promised a faster set-up process for virtual machines and that caught my attention.
Click Windows or macOS to download multipass for your operating system. The installation process is pretty straight forward, just make sure to follow the default settings and recommendations.
While setting up for installation on Windows, you will notice that it selects the Hyper-V as default if you use a windows OS pro or workstation. However, if you use the home edition, Virtualbox should be selected as the hypervisor as Hyper-V will be unavailable.
 |
 |
With Multipass and VirtualBox installed, we make sure that VirtualBox support is enabled for Multipass as follows.
Windows
If VirtualBox was selected over Hyper-V, in an admin terminal run:
multipass set local.driver=virtualbox
macOS
In a terminal, run:
sudo multipass set local.driver=virtualbox
With this done, we can then create a Virtual Machine with the multipass launch command. If we want a specific version of the OS, we need to include an optional image to launch else, the latest stable version of Ubuntu will be installed.
To install an instance of the bionic version of Ubuntu (18.04) named Delta and allocated memory of 1GB and disk space of 5GB, run:
multipass launch -d 5G -m 1G -n Delta bionic
-d specifies the disc space to allocate, -m specifies the amount of memory to allocate and -n signifies the name of the virtual machine. If the latter is absent, Multipass selects a random 2-word name (joined by a hyphen). The names are amusing so you could try out:
multipass launch bionic
With that done, you now have two virtual machines running on your system. Isn’t this so stress-free?
Running multipass list should show you all VMs and their status (running, stopped, deleted).
You can delete the second VM if you have no use for it, re-execute multipass list to see its changed status and recover allocated memory by executing the commands below.
multipass delete [generated-name]
multipass list
multipass purge
At this point, we have a VM named Delta running but have not used it.
Multipass lets us run commands in the VM without being in it yet with
multipass exec [name of vm] [command] but that's just a bother so we shall break into the Shell with the command below.
multipass shell Delta
This loads for a bit then displays a Linux terminal.

Now one would naturally expect that since we have linked VirtualBox with Multipass we should be able to view our VM instance in Vbox's interface. That in fact is what this part of the docs directs us to do. It, however, did not work out for me but you can go ahead and try it out.
Setting up a GUI for your virtual machine
Now here we are with just a shell to our virtual machine. I found two ways of installing a GUI. If your device runs on an unlicensed Windows device(home edition), the “lightweight path” should be what you select else, read through both options and use what fits in with your end goal.
A “not so lightweight” option
In this path, we install Xrdp, an open-source implementation of the Microsoft Remote Desktop Protocol (RDP) that allows us to graphically control a remote system. To install this, run the following sequence of commands in your opened shell.
sudo apt update
sudo apt install ubuntu-desktop xrdp
This might take a while depending on your internet connection speed so feel free to grab a cup of tea or whatever drink you like.
Once this is done, you can then set a password to the default ubuntu user by running the following command.
sudo passwd ubuntu
We will then be asked to enter and re-enter a password. This concludes operation on the server-side.
For the client, we can use on Windows the Remote Desktop Connection application and on macOS the Microsoft Remote Desktop application from the Mac App Store. There, we enter the virtual machine’s IP address (which can be found by issuing the command ip addr in your shell), set the session to XOrg and enter the username and password we created on the previous step.
A lightweight option
If you only want Multipass to launch one or a couple of windows and not a complete desktop, this is the right path. Here, we use the X window system to connect the applications in Multipass to your host machine letting them tap off its capabilities. Our aim is to connect the windows singly and not as a desktop.
To use X11 on Windows, install the X server which can be found here. The installation is pretty direct, just make sure to follow defaults and recommendations if any.
 |
 |
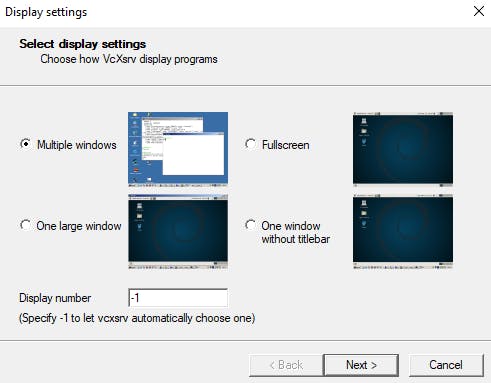
Launching the now installed X server through the X launch application on your desktop or start menu, some options will be displayed. Below is a walkthrough of the advised selections.
Screen 0:
Stick with Multiple windows and leave the display number as -1.
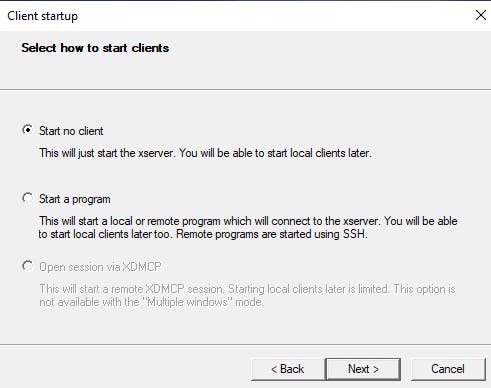
Screen 1: After clicking next, we see the client startup window where we should click "Start no client".
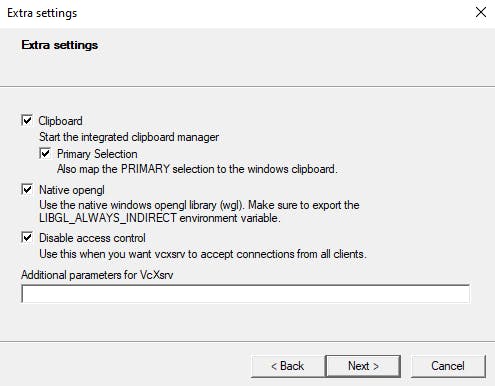
 Screen 2: Next up we have the extra settings, make sure to activate disable access control.
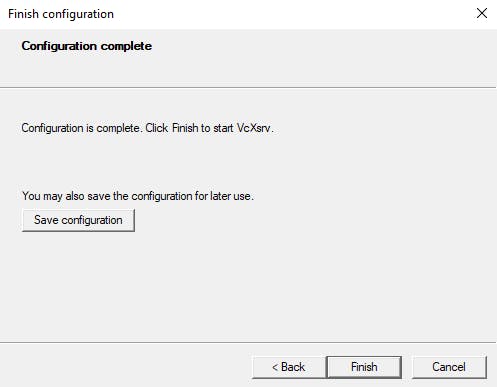
 Screen 3: Finally we save the settings on the next page and start the X server.
 An application icon will be displayed on our taskbar. On Windows, you may be asked to allow the server to communicate on private networks, click “Allow access”.

To configure the Multipass instance Delta, we will need the host computer's IP address.
To do this, open another terminal and run ipconfig. Copy this address then get back into the Delta shell.
Here, we set the DISPLAY environment variable to the server display on the host IP filling in the underscores with the IP address.
export DISPLAY=__.__.__.__:0.0
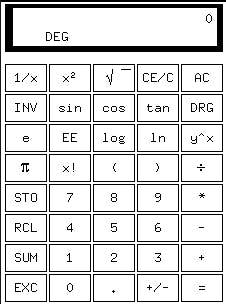
To test the setting, we will run in the host some simple program:
sudo apt install x11-apps
xcalc &
A small window containing a scientific calculator will show up.
Click this to see a list of all the other X11 apps and try out some of them with the command [app-name] & as shown above.
This server comes with Python3 installed but if you want python2 installed, run:
sudo apt-get python-minimal
To install and launch VSCode, run:
Sudo snap --classic code
code &
Make sure to always set the DISPLAY environmental variable before attempting to launch an application.

I hope you enjoyed this piece. Questions, comments and contributions are welcomed.
Reference: Stand-alone windows in Multipass - Documentation - Ubuntu Community Hub